I First research in to film that had a lot of
Researching in to filming with compositing and digital effects
Titanic
http://www.youtube.com/watch?v=CkJ1FqnUS0o
I found this quite mind boggling
I then look at composting 2d and 3d animation together
It is very interesting to see how the technology how progress over the year and how we use this for granted.
I began to research in to Who framed Roger rabbit.
I looked in to how how they manage to composite this with out the mean of digital manipulation.
Research in to filming optical printers
I then began to look in to how they created the spacial effects in the film Merry Poppins and how i could try and use this to inform my work
I then had a look in to Research in to filming optical printers
I found a documentary
I then found this very modern children's Tv program call Little Howard's big question. I found this very delightful to watch.
superman research
I then did a little test of out group logo that Gary lovely made for our group.
Wednesday 26 January 2011
Friday 14 January 2011
researching in to Leonard Da vin ic
I began to start
Here the documentary
I have decision to recreate a mock up of the Da Vinic tank to help me better improve my modelling skills
to get ready for
I will try to re create it step by step from the documentary as best as i can.

i recreated this is maya by simple getting a pipe shape and scale it so it was very thin and
got some cubes and scale them accordingly to the design


Within building the weals i very simple go a pipe shape and make the hold of the pipe very small then inserted a lot of small cylinders around the weal


step 4 making the barrel gears. The barrel gear transfer the power from the crankshaft to the main weals


I then combined the cylinders to the weals weals ( I know these weals look different to the ones before the reason for this is that maya crashed. as a result of this i made new weal not realising that they where completely wrong. it is documented that I changed theses correctly later on.)

After that I place the weals in the base that I made earlier


I then started to model and lay out layout where the crankshafts is and


maya problems
For some reason when I combined the barrels gear to the crankshaft they don't move in correlation with each other. I ask a fellow colleague of mine Arran why this was doing it. He told me it was due to the anchor point


Here the weals
I suddenly realize i made mistake and put a different set of weal in the base with out realizing so i corrects this by change them accordingly.


I then placed the barrel gear in to place in correlation to the weals


I then created the floor plane of the tank

i then put the weal hold shot in to place so the weal don't fall off.

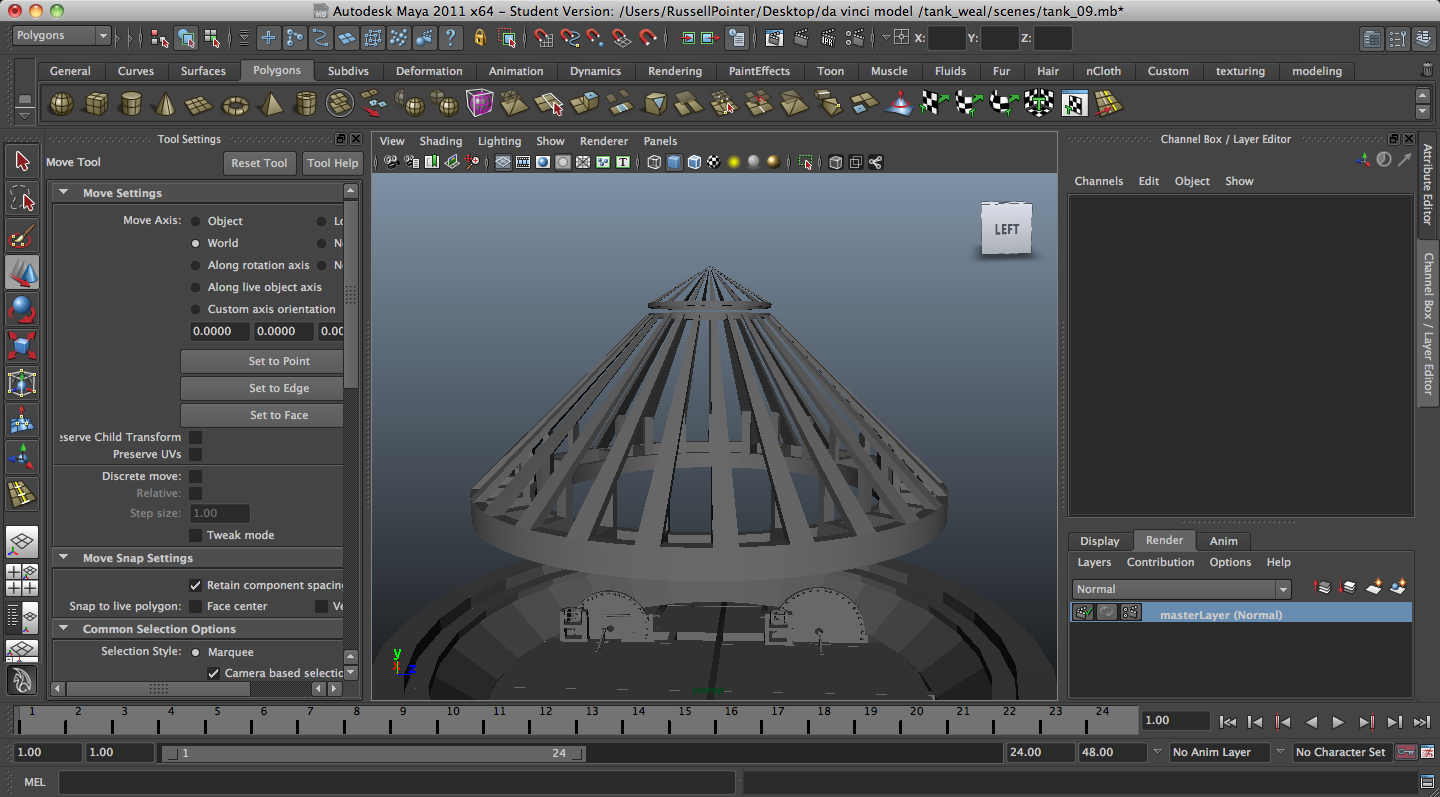
I then started to model the top part of the tank with


For the inside of the shell I needed to make more supports i did the same as i did with the outer shell

I made another tube and extrude every other shape


I then stared to model some basic cannons


I then cover the body with a hollowed out shell

Here is a 360 of the tank so far.
I then stared to colour in the tank
I simple just assigned new materials to the abject and assigned it to a lambert.


tank
My tutor Jared taylor sergusted to research in to Leonard Da Vinic due the the cogs in the design of the windmill.
When i was researching on youtube i found this brilliant documentary online entitled Doing da vinic
Where team of highly skilled builder recreating Da vinic invention from his own drawing back 500 years ago. This show you step by step how they where built.
I have decision to recreate a mock up of the Da Vinic tank to help me better improve my modelling skills
to get ready for
I will try to re create it step by step from the documentary as best as i can.
stage one
here is a scene of the base of the tankstill from doing a vinic on some kind of cad system
got some cubes and scale them accordingly to the design

Step 2 making the weals
Within the tank design the weals our quite large.
Within building the weals i very simple go a pipe shape and make the hold of the pipe very small then inserted a lot of small cylinders around the weal

stage3 bulting a slots to hold the weal of the than


theses go on the side of the weal to support the weals and also allowing it to weals to move accordingly
After that I started making the barrel gear.
Within making this object I just got 2 cylinders and then flatten them to a and point. After that I got another cylinder and stretched it out and made it very thin tube

I then combined the cylinders to the weals weals ( I know these weals look different to the ones before the reason for this is that maya crashed. as a result of this i made new weal not realising that they where completely wrong. it is documented that I changed theses correctly later on.)

After that I place the weals in the base that I made earlier

I then placed the gears barrel

I then started to model and lay out layout where the crankshafts is and

Still from Doing Da Vinic
I started to next model the top part of the windmill


I started to make there top bady shell of the of the tanks what i did was to get a tube shape and then went on to face mode selected every other face and then extrude the out and scale them in woulds after.


maya problems
For some reason when I combined the barrels gear to the crankshaft they don't move in correlation with each other. I ask a fellow colleague of mine Arran why this was doing it. He told me it was due to the anchor point


Here the weals
I suddenly realize i made mistake and put a different set of weal in the base with out realizing so i corrects this by change them accordingly.

I then started to make the support for the weals and the base of the tanks


I then placed the barrel gear in to place in correlation to the weals


I then created the floor plane of the tank

i then put the weal hold shot in to place so the weal don't fall off.

I then started to model the top part of the tank with

For the inside of the shell I needed to make more supports i did the same as i did with the outer shell

I made another tube and extrude every other shape


I then stared to model some basic cannons

It consists of a cylinder a stretched sphere and a pipe shape smoothed.


I there place the cannons around the tank by putting the anchor point dead centre of the tank and simple just rotating it.


Here is a 360 of the tank so far.
I then stared to colour in the tank
I simple just assigned new materials to the abject and assigned it to a lambert.


group work time and uv mapping
I was given the task with in the group to model the boiler room and the cogs around it by Sam as our course leader
Here are the designs I have to follow troughs from sam


As a result of having to many faces in the model i had to do the hole model from scratch I simplified the model with basic shapes and build didn't extrude the model as much as last time
I first tried to places the vertexes in to a curve


I then tried to selecting faces and then simples extruding then out but sadly it didn't work.

I then got a flat plane and made it in to a half circles and attached it to the body


I then come upon the idea just simple made half a circles and attached it to the main body and then extrude the faces out. The problem with this is that i coudnt get the curve right in the


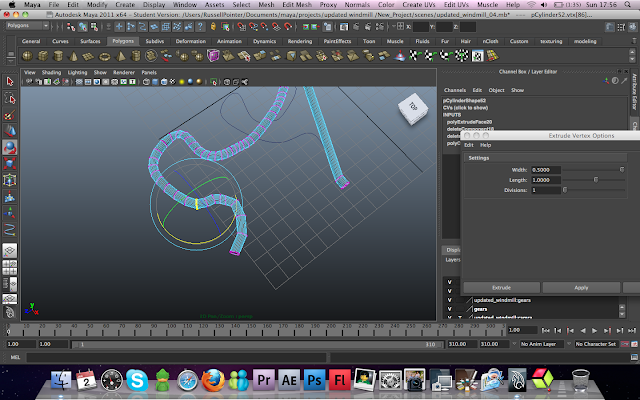
i then began modeling the pipes
I then started work on the boiler pressure gage i simple got half a cylinder on the cylinder


I then selected the top face of the cylinder and then scaled them down slightly

I then extrudes and extra face on top of it
 and the continued to extrude and level of faces


I realised that this wasn't going to work so I then stared from scratched


I then kept repeated the proscess

I then Extrude the faces out to make make

I then placed the model split in the middle of the plane with sam designs on to make my life easyer when I am modelling


I then selected the inside faces to make my model have less polly. I was inform by jared my tutor to limit the amount of polygons.

I then continually make little changes in and around the lowers body of the windmill


I then stared to work on the set pieces around the Windmill. I began with making the little houses started with a simple cube and then with using the insert loop tool sliced in the middle of the cube.
After that I began making the windows for the house by using a simple


I then did a different type of house

I then started working on the balcony

I then place the house


I then started work on the other smaller wing

I then started with very basic shape to build up the other wing of the windmill. the to make the supports of the windmill I got a cube and stretch it out making a few subdivisions


I then began molding another cog

I started with a cylinder and then indented one of the edges of the

I then created another cylinder and then extruded an extra face on to the top of the face


I then the round pieces as a guide line to to move the edges around


Then final model


I then stared to make the door entrances of the windmill I just very simple got a pipe shape and cut it in half then extrude the bottom of it. Then stretched out a phew vertexes

I then had to model the pipes for the outside. I did the sam technic for the pipes as I did in the boiler room in side with selecting every other vertexes

I then rig the model so that i could bend it the pipes to the desired shape shape


I was very careful not to stretch the rig to far so the model wouldn't deform to much.

I then stared to just slot them in and around the windmill to where i wanted them

I then began to model the higher rooms of the windmill


I was having trouble in first with trying to model the sail the reason was i been pulling in the faces of the object winch made it and somewhat misshapen. i asked joe to help me and he said you need to use the edge mode tool in maya

I then started using the insert loop tool in maya winch i never used befor


I had learnt a new skill in maya today called the curves tool. I found this tool very useful you simple click the curves in the shelf and then click on the blue S with the pencil on it. then you draw out on the grid. then u place a cube on the line that you just created


working on the cogs of the windmill
I researched in to many different type of cog with in the steam punk theme by looking at different types of steam punk invention

Its is very interesting to see how all the different cogs some what line to make a
I'm firstly going to make my own very of these cog to figure out how to model them and then tried to transfer them to the steam punk style


I tried doing a different type of cogs and experiment with them


After the i did the work I was inform by Sam


two weeks before hand in
At this point in time its was the end of the christmas holiday and the whole was in for a meeting,
Due to bad commutation on sam part Joe wasn't inform that he need to make changes on the model. So I showed Joe what i did and the group decided to get me and joe to finish of the windmill as soon as possible.
The first thing we did was combined bot our models together i took joe main body work and put and the props and scenery around the windmill and was in charge of recreating the sail on it

I then started to make the balcony

I then started working on the main balcony in the windmill

and then did the guard rail to it


 Me and Joe decided that we needed to apart more detail in to the the house so he made me some titles
and I placed them in and around the


Final model of the windmill
i had very good fun with in the last few day with Joe modeling the rest of the windmill it was the only time i had a chance to collaborate with


I started with a basic cylinder and put

I then started making the rivets of the boiler i used simple sphere and placed them around the boiler

I then placed the boiler on to the windmil


There was a problem in maya due to there being so many titles its was taking a long time to process on maya. So we simple deleted them because we where worried that it would take longer on the
Texturing and uvmapping time
I offered to do the UV mapping on the out side of the windmill
I stated with the rocks however I didn't UV map these. i just assigned a lambert on to them in the places on to the mesh. the reson for the was the rock where too small and no one would notice them being badly texture from a distances


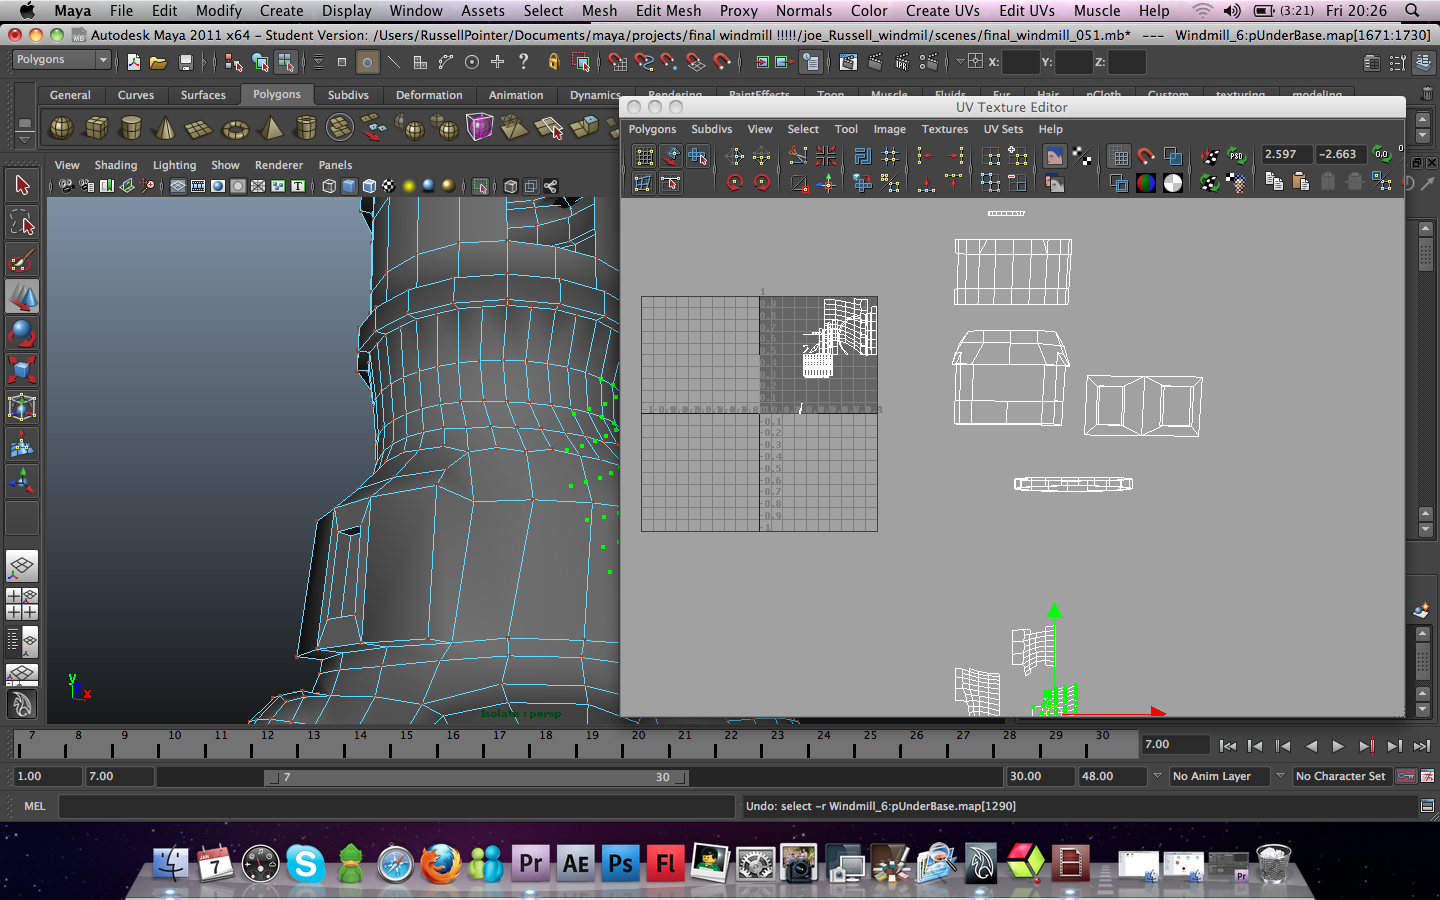
Within doing the UV mapping I stated by selecting parts of the model in face mode. Then I went on to window and then selected UV texture editor the show with the selected faces i then when on to create UV and then clicked create UVs based on camera. this created a top of the selected faces
UV texture editor.

I then started to arranges the Uvs on the map planner

I used texture from photo I took of my Dads workshop and the tried to incorporate then in to the vu maps

I then selected parts of the windmill and then made them in to new psd links. psd link are the uv maps in wireframe


i counted with selected each of of the uv and then tried to arranged them as best as i could


UV mapping the boiler
I then did the same as last time with the windmill and used the create UV based on camera and block out on on the uv texture editor and created a psd network from them.

vu mapping other parts of the windmill


UV Mapping the houses
cause the houses where very simple shapes i used only three different texture each


First quick render of textures


render test of my of my box

my final render of the boiler

I then stared to UV mapped the wings that Joe made.


Here are the designs I have to follow troughs from sam

I found this very annoying the reason for this is sam didn't produce a front and side drawing. I ask him on number of times to do another concept drawing for me and sadly he didn't.
Sam was very specific in what he wanted. The problem with this is if one want to specific given out a design you need a number of drawings
In the end I got jerome to do it for me. Winch was very much appreciated. The reason for myself not drawing it is because my draftsmen's skill aren't the best in the world

I began with a general block out of the boiler and continue arranging the edges and vertexes
I have having tenements problem with the model the reason is was to many faces within the model there faces with in faces. It got so complicated decided to remodel it from scratch.
I was also given a layout of all the floor inside the windmill by sam. Then it was just a simple case placing everything in the scene.


With in modeling the boiler I had a hard time trying to to create in the cured seem of of the boiler

As a result of having to many faces in the model i had to do the hole model from scratch I simplified the model with basic shapes and build didn't extrude the model as much as last time
I first tried to places the vertexes in to a curve

I then tried to build the ark of the curve with vertexes. the trying to make the cure reasonable flat.


The problem with this was it came out all wonky and for some reason made extra faces

I then come upon the idea just simple made half a circles and attached it to the main body and then extrude the faces out. The problem with this is that i coudnt get the curve right in the

In the end i just use the half circles plane and merge the vertexes to the geometry of the body.

i then began modeling the pipes

Within modeling the pipes I first got a cylinder and then highlighted every other line of vertices and then extruded them in.
like so
like so
I then after that I didn't know how I would be able to bend the pipe around. i then came up on the idea of rigging the pipe and bending
I then started work on the boiler pressure gage i simple got half a cylinder on the cylinder

I then hollowed out the side of the pressure gages

After this point we where having group problems due to lack of commutation with other members of the group. I was inform that joe didn't complete the due to Sam not telling him he need to improve the modeling on it.
No one in the group wasn't doing anything about so I offered to rebuilding it from scratch.
Here is the concepts of the windmill from sam its the only one

I first got a plane and assigned a new martial to the plane of Sam drawing. i then first started work on the main body of the windmill with a cylinder

I then selected the top face of the cylinder and then scaled them down slightly

I then extrudes and extra face on top of it


I realised that this wasn't going to work so I then stared from scratched

I then scaled down the cylinder

I then extruded out another face

I then scaled the top faces to start building a small mountain like shape.

I then kept repeated the proscess

I then Extrude the faces out to make make

I then placed the model split in the middle of the plane with sam designs on to make my life easyer when I am modelling


I then stared to aline the face of the model so that they where more inline with the model

I then selected the inside faces to make my model have less polly. I was inform by jared my tutor to limit the amount of polygons.

I then continually make little changes in and around the lowers body of the windmill


I then stared to work on the set pieces around the Windmill. I began with making the little houses started with a simple cube and then with using the insert loop tool sliced in the middle of the cube.

After that I began making the windows for the house by using a simple


I then did a different type of house

I then started working on the balcony

I then place the house


I then started work on the other smaller wing

I then started with very basic shape to build up the other wing of the windmill. the to make the supports of the windmill I got a cube and stretch it out making a few subdivisions


I then extrude the faces and aline the up to make the supports of the wing


I then began molding another cog

I started with a cylinder and then indented one of the edges of the

I then created another cylinder and then extruded an extra face on to the top of the face

I then hollowed out the cylinder and added to hollowed and circles on each side of the cylinder


I then the round pieces as a guide line to to move the edges around

I then did the same the the other for side

I the combined all the three pieces together

Then final model


I then stared to make the door entrances of the windmill I just very simple got a pipe shape and cut it in half then extrude the bottom of it. Then stretched out a phew vertexes

I then had to model the pipes for the outside. I did the sam technic for the pipes as I did in the boiler room in side with selecting every other vertexes
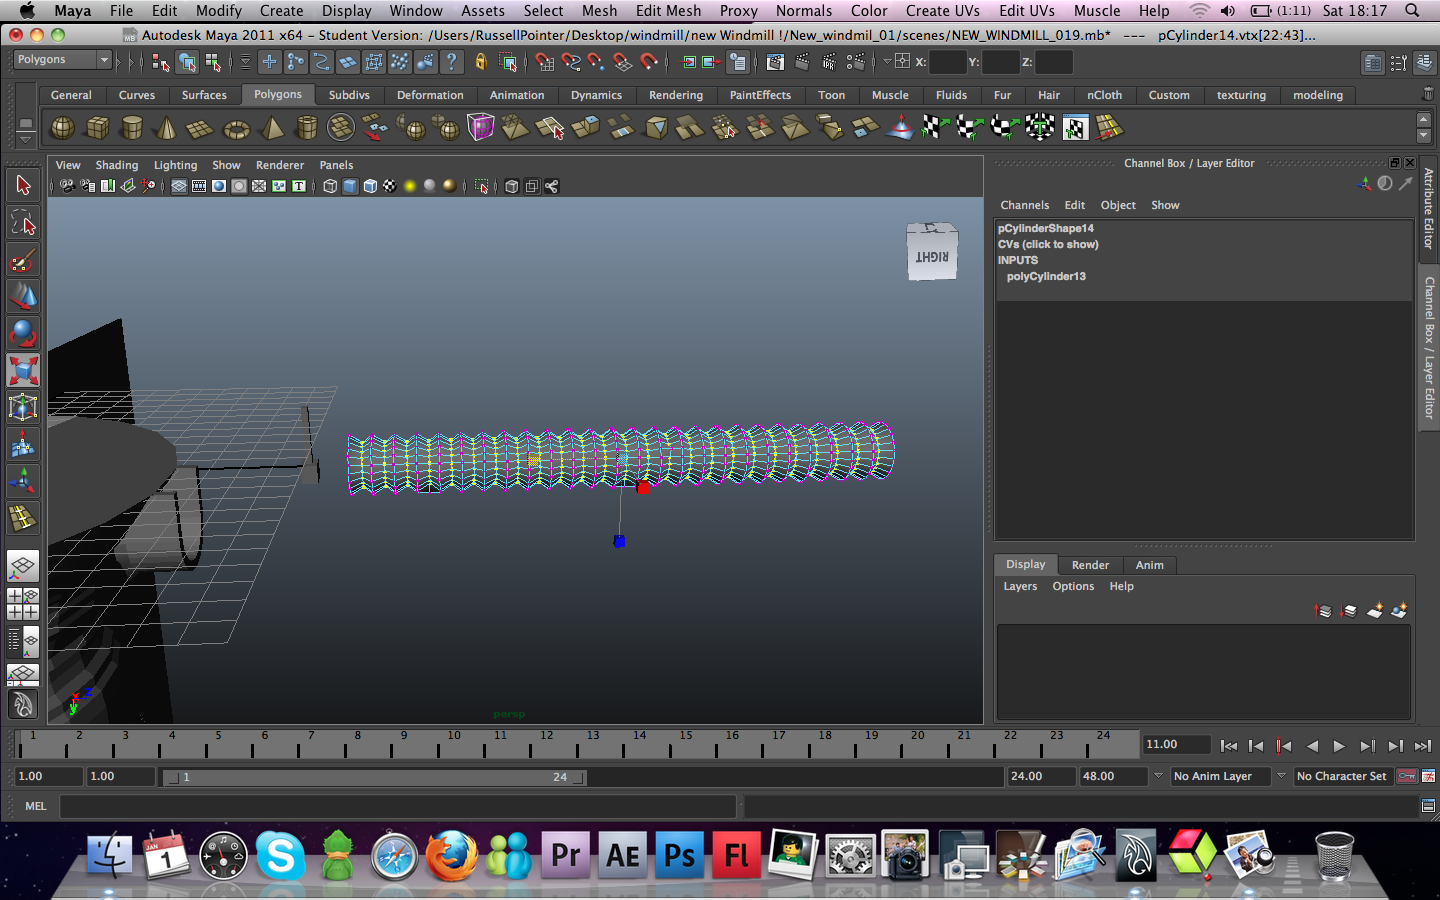
I then rig the model so that i could bend it the pipes to the desired shape shape


I was very careful not to stretch the rig to far so the model wouldn't deform to much.

I then stared to just slot them in and around the windmill to where i wanted them

I then began to model the higher rooms of the windmill


I then started to model the main sail of the windmill

Problems I'm not sure how to model the cloth with in the sails
I was having trouble in first with trying to model the sail the reason was i been pulling in the faces of the object winch made it and somewhat misshapen. i asked joe to help me and he said you need to use the edge mode tool in maya


I had learnt a new skill in maya today called the curves tool. I found this tool very useful you simple click the curves in the shelf and then click on the blue S with the pencil on it. then you draw out on the grid. then u place a cube on the line that you just created


working on the cogs of the windmill
I researched in to many different type of cog with in the steam punk theme by looking at different types of steam punk invention
Its is very interesting to see how all the different cogs some what line to make a
I'm firstly going to make my own very of these cog to figure out how to model them and then tried to transfer them to the steam punk style


I tried doing a different type of cogs and experiment with them


two weeks before hand in
At this point in time its was the end of the christmas holiday and the whole was in for a meeting,
Due to bad commutation on sam part Joe wasn't inform that he need to make changes on the model. So I showed Joe what i did and the group decided to get me and joe to finish of the windmill as soon as possible.
The first thing we did was combined bot our models together i took joe main body work and put and the props and scenery around the windmill and was in charge of recreating the sail on it

I then started to make the balcony

I then started working on the main balcony in the windmill

and then did the guard rail to it


and I placed them in and around the

I then just put surports in to the for the balcony which was just a simple 


Final model of the windmill
i had very good fun with in the last few day with Joe modeling the rest of the windmill it was the only time i had a chance to collaborate with


My then started making the boiler
I started with a basic cylinder and put

I then started making the rivets of the boiler i used simple sphere and placed them around the boiler

I then placed the boiler on to the windmil


There was a problem in maya due to there being so many titles its was taking a long time to process on maya. So we simple deleted them because we where worried that it would take longer on the
Texturing and uvmapping time
I offered to do the UV mapping on the out side of the windmill
I stated with the rocks however I didn't UV map these. i just assigned a lambert on to them in the places on to the mesh. the reson for the was the rock where too small and no one would notice them being badly texture from a distances


Within doing the UV mapping I stated by selecting parts of the model in face mode. Then I went on to window and then selected UV texture editor the show with the selected faces i then when on to create UV and then clicked create UVs based on camera. this created a top of the selected faces
UV texture editor.

I then started to arranges the Uvs on the map planner

I used texture from photo I took of my Dads workshop and the tried to incorporate then in to the vu maps


i counted with selected each of of the uv and then tried to arranged them as best as i could


UV mapping the boiler
I then did the same as last time with the windmill and used the create UV based on camera and block out on on the uv texture editor and created a psd network from them.

vu mapping other parts of the windmill


UV Mapping the houses
cause the houses where very simple shapes i used only three different texture each


First quick render of textures

Making the textures of boxes in photoshop

render test of my of my box

my final render of the boiler

I then UV mapped the balcony
I then stared to UV mapped the wings that Joe made.

Then i did a second render test c if the text where to see anything was out of places

for some reson I made to lose the man body UV and wasn't able to replace them so most of the modeling was white
Arran was given the task of rendering out the whole projects
here is the final out come

personal statement
I feel that the project has befitted me in many ways.
The first of which they project have given a better upstanding in modeling and given me growing confidences in this field. i also have gain a new skill within uv mapping i have main planes for the further with this skill.
I felt that the group leader Sam was a control freak and doesn't know how to lead a group diplermaliticaly .
on many occasions he ignored suggestion or any input from other members of the group.
most of the group where every reluctant stand stand against him.
also bad communication on Sam part effected the final out come of the project
Subscribe to:
Posts (Atom)